That's very hard to resist in getting some blueberries when it's on sale. I just love it so much. Without thinking about what to do with it and I buy it first. Then, I came out with this recipe which is a very rich, buttery yet flavourful pastry, that's sound quite naughty and yes I think I'm quite naughty recently as for some reason I've been good for some time :)

This is something that the 'English favorites' and also my Mr. favorite. His every bite will naturally came out with an "uhmmmm......" kind of yummy voice and make me feel so happy that I've made it real good, it's just a very encouraging kind of voice. I've control the sweetness of the entire pastry which is from the tart to fragipane as well as the crumble. The sweetness from the blueberry is very fresh and juicy. I find that all ingredients are just so friend to each other which the ground almond fragipane enhance the flavour and the crumble toppings give it a bonus texture. Smell good and taste good!

English would love to serve it warm with custard, cream or vanilla ice cream. I only have the mango ice cream which I made earlier so I serve it with a dollop of the leftover ice cream. Our stomach was stuffed after finished a portion as it's a real rich pastry!

Recipe:
For the shortcrust pastry:
2 eggs
2 tbsp cold water
225g plain flour
20g sugar powder
110g butter, cold and diced
Separate the eggs. Add 2 tbsp cold water to the egg yolks and stir with a fork. (You can use the egg whites for another dish or freeze them.)
Place the flour and sugar powder into the bowl of a food processor, followed by the cold butter and the salt.
Turn the processor on and pulse several times until the mixture resembles fine breadcrumbs.
Add two-thirds of the egg yolk/water mixture and pulse again. If the mixture is still too dry, add the remaining egg and water mixture (you may not need to use all of it). Be careful not to overwork the pastry. Stop pulsing when the mixture has the consistency of chunky breadcrumbs.
Turn the pastry out onto a clean, floured work surface and, with floured hands, bring together to make a smooth dough, but don't knead.
Shape into a flattened ball, wrap in cling film and refrigerate for about 10-15 minutes. You can keep the pastry at this stage for 2-3 days if not using it immediately.
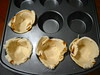
Remove the pastry from the fridge. On a clean, floured work surface, roll it out with a floured rolling pin until it's slightly larger than the flan ring. Using the rolling pin, lift the pastry and lay it over the flan ring.
With your fingers, lightly press the pastry into the sides of the ring. Run a rolling pin over the top of the ring and pull away the excess pastry at the edges. Using your fingers, gently press the pastry up to slightly build up the height of the pastry at the edges. Prick the base of the pastry with a fork. Place in the fridge to relax for about 30 minutes.
For the Fragipane:
142g ground almond
25g plain flour
1 tsp vanilla extract
125g butter
90g caster sugar
In a food processor, blitz the whole almonds to a fine powder and put into a bowl. Then blitz the butter and sugar until light and creamy. Add this to the almonds with the lightly beaten eggs and fold in until completely mixed and nice and smooth. Spread the batter on the ready pastry case then place in the fridge to firm up slightly.
For the Crumble:
55g ground almond
140g plain flour
85g polenta (not quick cook)
140g butter, diced and cold
90g brown sugar
splash of water
Place the almonds, flour, polenta, butter and sugar in a food processor and pulse briefly several times, just to mix. The mixture should look like coarse breadcrumbs.
Tip out into a bowl and add a splash of water. Use a spoon to mix briefly - it should be quite clumpy.
To assemble the tart:
Place the blueberries on top of the ready pastry with fragipane then sprinkle over the crumble. You might not need to use all the crumble. Store them in a zip bag and place in the freezer for future use. Place the ready tart into the 180C preheated oven and bake for 50 minutes. Place it on a wire rack to cool down before unmold. Carefully unmold the tart. If you find the bottom is still soggy, put them back into the oven and bake until harden. Place a piece of aluminium foil to cover the top to avoid burning the crumble.
The tart could store in the fridge or room temperature. I store some leftover in the fridge then reheat in the oven at 150'C for about 10 minutes until it's slightly warm up. Serve with a dollop of ice cream, enjoy!

 I've no idea what cakes I would like to bake, my mind is just hanging and running out of idea. Other than making ice cream, I feel myself have no mood to do anything (may be the weather is too hot). So, I decided to do something simple rather than complicated baking.
 This the simple marble chiffon cake I've baked which is nothing special that had filled my mood as the texture is excellent. The bad thing is the surface got a tunnel which I've no idea why. How nice if it's a smooth surface and this could be the perfect baked chiffon.
 This reminded me life is not perfect, it's the matter of how we value and appreciate everything we have at the moment.
 Ingredients for 21cm chiffon pan:

 Recipe from "The Perfect Scoop":


 After trying three types of ice cream, I still had some left over cream so I make this durian ice cream since now is the durian season and it's quite cheap in the market.
 I followed the mango ice cream recipe from SSB but using durian. As the sweetness from the durian is very strong, I cut down some sugar to balance the flavour. This is my first time having such a super rich durian ice cream, we find ourselves like eating the real durian and it's totally different from what I bought from the supermarket. It's so flavourful till you will find the smell stay in your mouth for the whole day (no kissing on that day) kekekeke.... :) One thing good about homemade ice cream is we could have the REAL flavour of ice cream!


 I like to use the focaccia recipe from 孟老师的100道面包. It's just so simple to make that I don't have to knead too long for the dough. This time, I made something extra for the recipe which is sandwiched some ham and mozzarella cheese with onion, garlic, herbs and cheddar cheese for toppings.
 The result ended up very yummy that I can just eat it straight a way without a bowl of soup. It's a softness and crusty combination from the inside to outside. The topping enhance the flavour which the onion and garlic almost caramelized and the herbs bring out a fantastic aroma together with the cheddar cheese. I like it very much! Hope you'll like it too!
 You might be frighten by these alien. It might gives you an uncomfortable feeling. Don't worry it's not worm or insect or rope. My other half thought it's noodles at his first sight. There are non of them. It's just a chestnut cream that was decorated from piping bag.
  Well, if you've seen this from the front page of a chiffon recipe book with this similar picture and this is the recipe book that I've been reading 戚枫蛋糕秘方传授. I think the taste of this chiffon might not be so popular, unlike chocolate, coffee or banana chiffon.
 The sponge texture is really light, soft and fluffy whereas the taste is not very sweet as I pureed some unsweetened peeled chestnut which I bought from DAISO and mix it with the canned chestnut paste. The topping of the chestnut cream enhance the flavour that is just nice to eat with a bite of sponge and some cream. If you like it, you'll ask for more, but if you don't, you don't even feel to have a second bite. A piece is definitely not enough for me as its lightness really fascinated me.
 I bought a pack of organic dried fig from Cold Storage long time ago, due to my sickness, concert and so on, the dried fig has been hibernating in the fridge for sometime. I think I've to use it before it goes expired. This fig and brown sugar cake recipe from the book of "Luscious Healthy Desserts 搞纤低卡烘培" taste quite special for me.
 This cake is light and the sweetness from the dried fig is quite special. I reduced some sugar from the cake recipe as I find the fig is very sweet. The cake suppose to be spread with whipped cream but I don't have whipping cream on hand so I decided to make some buttercream to go with it. I think the cake would be much softer and lighter if I rolled it with whipped cream. The method of this recipe is quite similar to chiffon cake unlike some swiss roll recipe which is beat the whole eggs until fluffy then add add the flour. Anyway, it's not very difficult to make and I would like try to replace the fig to prunes, cherry or other dried fruits on my next attempt.
 I tried a mango yogurt ice cream recipe from
  After my the first attempt on the
 Anyway, the soft buns are really good to eat with some cheddar cheese topping and dried parsley for garnishment. I think this potato dough would be good for making others savory buns too!


.jpg)